Since I tend to ramble a bit in my posts, I’ll post the HOW in this blog, and the WHY separately in an upcoming blog. Chances are, if you’re reading this, you already know that you should be swatching in the round, though you may not realize why. The quick and dirty why is that purled stitches tend to be wider than knitted stitches, so when you’re knitting one side and purling the other, the gauge is *typically* larger than when you’re knitting every stitch.
How to Swatch in the Round
I’m going to use the Lattice Hat from issue eleven : head over heels as an example, since its gauge is in Stockinette stitch (which works best for demonstrating, as the stitches are easily defined).

The pattern calls for:
Needles: US 5/ 3.75mm or size to obtain gauge, in 16”/ 40cm circular and DPNs, and US 3/ 3.25mm or 0.5mm smaller than gauge needle, in 16”/ 40cm circular.
Gauge: 21 sts and 30 rnds = 4”/ 10cm over Stockinette stitch.
Planning Your Swatch
Decide how many stitches you’ll need to cast on for your swatch. The wider the swatch, the more accurate your gauge measurements will be; a 4”/ 10cm square is generally considered adequate. The Lattice Hat’s gauge takes 21 stitches for a 4” wide piece, plus we’ll want a few stitches on either side for a clean edge (you’ll see why later), so let’s cast on at least 28 sts.
The hat calls for “Needles: US 5/ 3.75mm or size to obtain gauge, in 16”/ 40cm circular and DPNs, and US 3/ 3.25mm or 0.5mm smaller than gauge needle, in 16”/ 40cm circular.”
Start with the US 5/ 3.75mm, unless you know yourself to be a tight knitter, in which case, start with a larger needle size than suggested. Likewise, if your stitches tend to be on the looser side, start with a smaller needle size. It’s a good idea to use the same type of needles that you’re going to use for your project, since different needle materials (polished wood vs bamboo vs metal vs plastic) may result in different gauges.
Swatch Directions:
Step 1. CO 28 sts (or more, if you’re feeling ambitious). Any CO technique is fine – you don’t have to use the CO called for in the pattern. If the CO is new to you, this is a good place to practice it over a small number of sts.
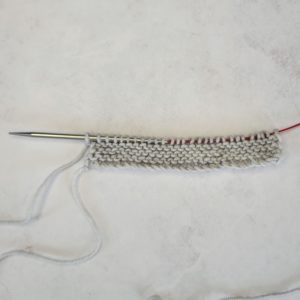
Step 2. Knit a few rows back and forth, creating a Garter stitch border. This keeps the lower edge from rolling. There’s no magic number, but I usually work 5 or 6 rows.
Step 3. After working the last row, don’t turn your needle.
![]()
Step 4. Slide the swatch from the left side of the needle back to the right side of the needle, as you would for an i-cord.
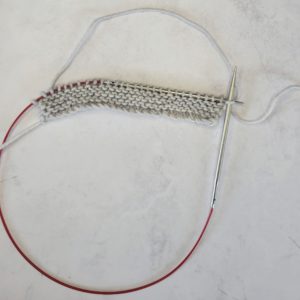
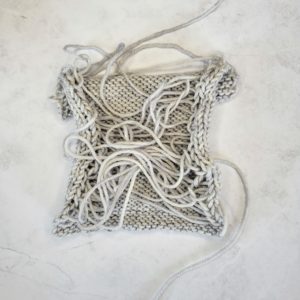
Step 5. Bring the yarn across the back of the swatch, leaving it to hang loosely behind the stitches. Leave the strand hanging; do not pull it taut as you would for an i-cord. This part makes my eye twitch; it just feels so sloppy!
Step 6. Knit across the row. The hat’s gauge is measured over Stockinette stitch, so all stitches will be knit.
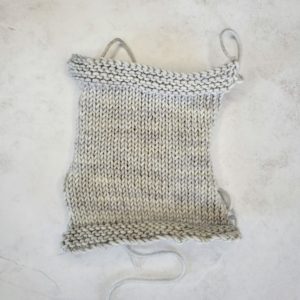
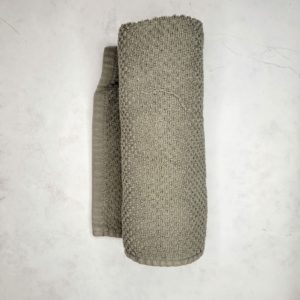
Repeat Steps 4 – 6 until your swatch measures slightly over 4”/ 10cm from the top of the Garter stitch edge. The swatch will be a cringey mess on the reverse side and along the edges, which is why the extra stitches were needed.
Step 7. Resume working back and forth in Garter stitch for a few rows to keep the swatch from curling.
Step 8. Bind off. Don’t skip this step, even if you’re going to re-use the swatch yarn for your project. You don’t have to cut the end, but binding off will prevent the border from being accidentally ripped out when you take the swatch off the needles.
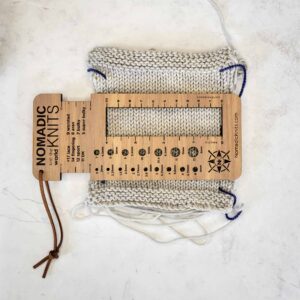
Mark the Stitches to be Measured
What? I swear as soon as I start counting stitches, they start dancing in front of my eyes, and I completely lose the ability to keep a tape measure or gauge-measuring device from moving around. Sometimes it feels like there are devious swatch villains trying to mess with me! I’ve tried using a DPN to keep my place, but if I blink, all is lost. With the goal of walking you through this process, I added in measuring lines using scrap yarn, and it made it so much easier for me that I think I’ll add it to all of my future swatches!
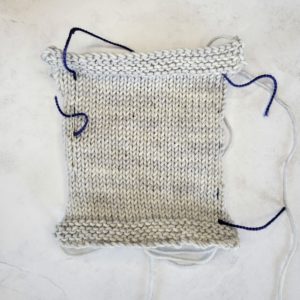
I simply used a tapestry needle to weave in a contrasting color. I used fingering scraps on a DK swatch, but the same weight yarn would work just as well. Don’t use heavier yarn, as it may squish the stitches and change the gauge. I threaded the first scrap just in from the messy edge stitches, then counted out 21 stitches (I counted three times, just to be sure, since the little buggers wouldn’t keep still) and placed the second scrap there.
If your project has two or more colors, use them here to test for color fastness, ensuring that your contrast colors won’t bleed into your main color, or vice versa.
Block Your Swatch
Ugh, are you even serious right now?! This is taking forever! Yes, I’m serious. You’ve already gone to all this trouble, so you may as well forge ahead! The reason for blocking your swatch is two-fold: to help the swatch lie flat for more accurate measuring, and because the wet stitches may actually change in size enough to affect the overall gauge.
This is How I Block
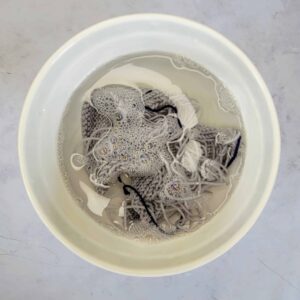
Step 1. Soak the swatch in water with a few drops of a wool wash like Soak or Eucalan (disclaimer: neither company sponsored this post; they’re just what I tend to use). Some knitters are very specific about water temperature (tepid, lukewarm, etc), but I just turn my faucet on and use whatever comes out. In southern areas where the water pipes are above-ground, the water temperature reflects the outside temperature, and comes out of the tap much warmer than in the north, where pipes are buried. I haven’t ever noticed a difference in swatching with these temperature swings; however, I would recommend not using hot water.
Step 2. Gently lift the swatch out of the water and let it drip dry for a few moments. Do not wring the swatch! Or any knitwear, for that matter! Set the swatch down on a dry towel (I just used a clean kitchen towel) and reshape it into a square. (My colors held fast! Yay!)
Step 3. Roll up the towel with the swatch inside (like a Swiss cake roll), gently squeezing to help the towel absorb the majority of the water.
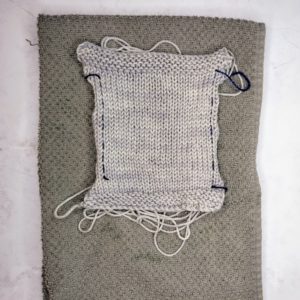
Step 4. While the swatch is still damp, shape it into as perfect a square as you can manage. Look at your stitches and make sure they are in a straight line horizontally and vertically. Try not to stretch or squish – I usually lift up each side and corner a few inches to feel for the yarn’s natural spring and bounce and let the swatch be the size it wants to be. Roughly measure it, noting that this may not be accurate. Let it dry.
*** Intermission ***
This is a good time to knit another swatch if your rough measurement is more than 1/2″ or 1cm from the hoped-for 4″/ 10cm.
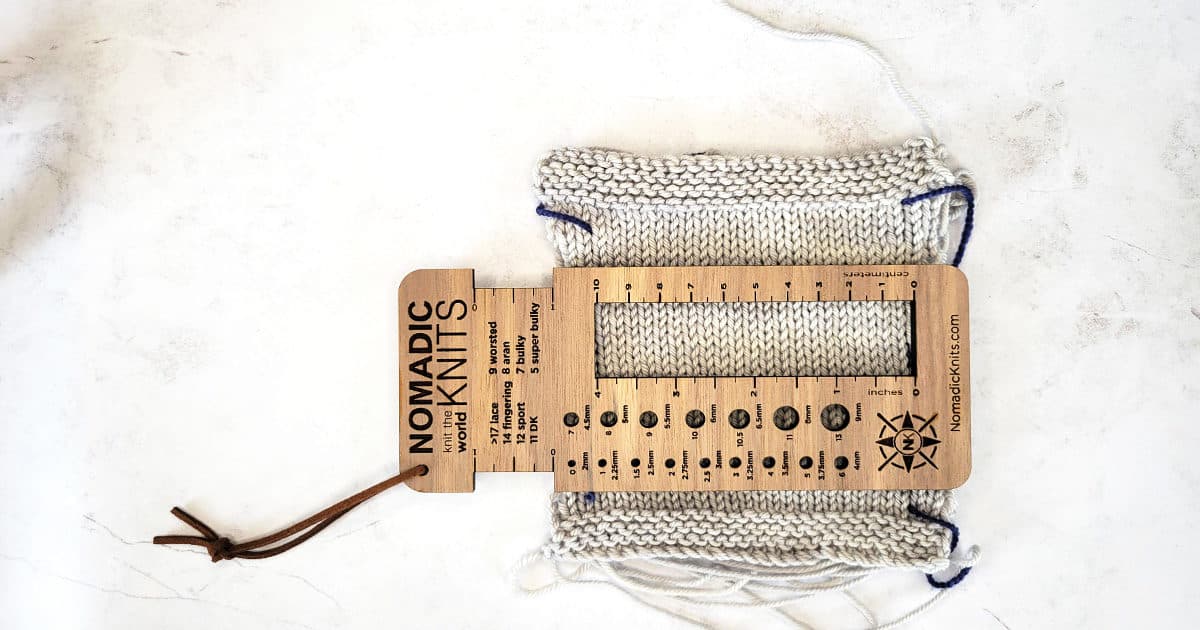
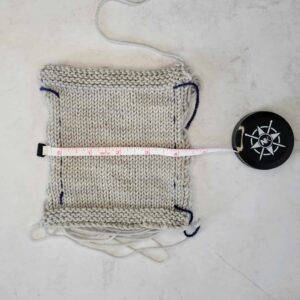
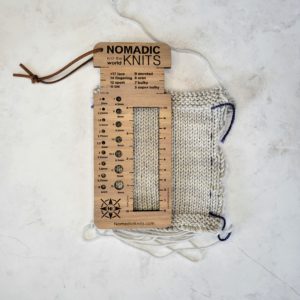
Measuring
Measure from yarn scrap to yarn scrap. You can use our beautiful wooden Gauge Gizmo, or a simple tape measure. With luck, it will measure 4″/ 10cm.
Next, measure vertically. You should be in the neighborhood of 30 rounds over 4″/ 10cm, but in *most* patterns (shawls, most hats, most socks…), the row or round gauge is much less important than the stitch gauge. Why? Scroll up to look at the Lattice Hat again – if you have an incorrect stitch gauge (measured horizontally), the hat will not comfortably fit around your head. If you have an incorrect row / round gauge, the hat will still fit the wearer, it’ll just be a little shorter or a little taller than the original. Plus, many patterns call for you to knit to a certain length or height anyway, so the vertical gauge becomes irrelevant.
Interpreting Your Measurement
If your 21 stitches measure less than 4″, it means that your stitches are too small, and you need a larger needle. If your 21 stitches measure more than 4″, it means that your stitches are too big, and you need a smaller needle.
Happy swatching in the round, everyone!
xo
Melissa
6 Comments. Leave new
Thanks for the info! Wow! Who knew!
You’re very welcome!
Thank you for these very thorough instructions. You have convinced me to swatch projects in the round!
Woohooo! Mission accomplished!
This is the most useful explanation of how to swatch in the round I have ever read! I especially like your method of using scrap yarn to mark the number of stitches!
Thanks so much! It really makes the counting so much easier!